Sand Slime is going to be a fun addition to your Grandma and Grandpa Playdatebox arsenal. It’s a slime mixture with just a bit of texture and you can use decorative floral sand to make it almost any color of the rainbow! I originally discovered the recipe on smartschoolhouse.com.
Sand Slime Ingredients:
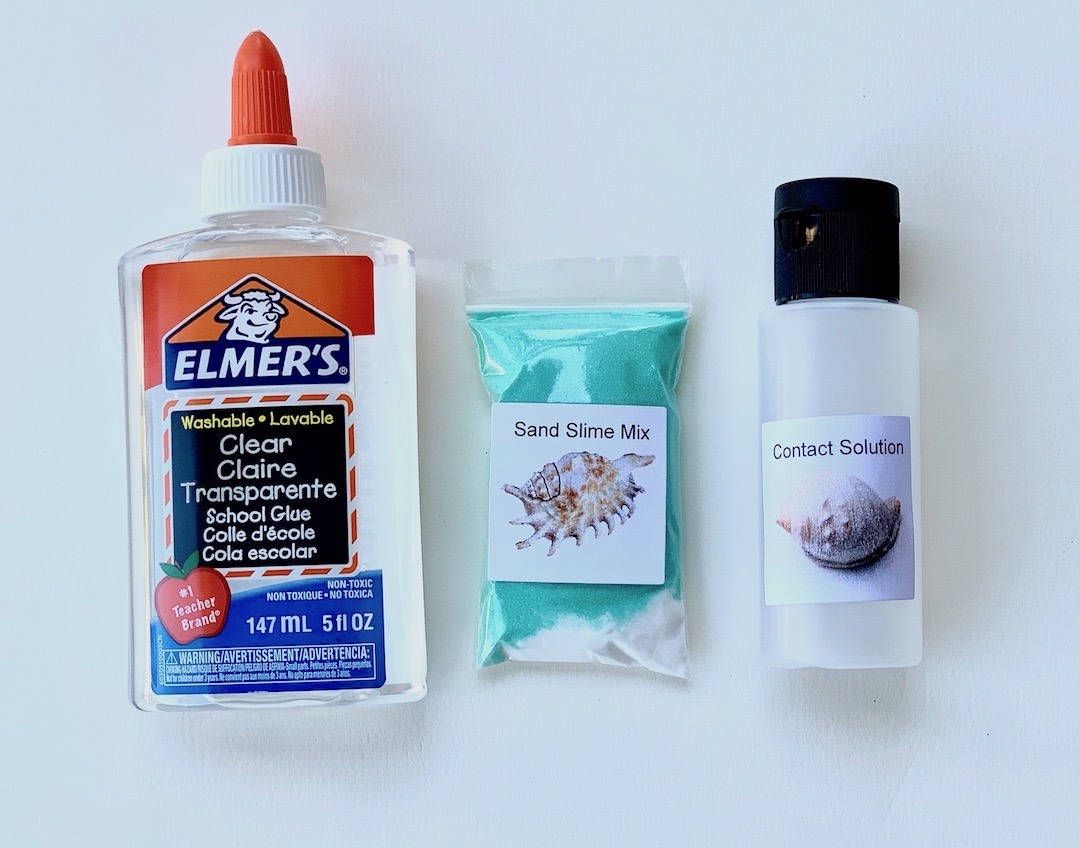
- 5 ounces of clear school glue for each color of sand slime you want to make. I buy glue by the 1/2 gallon to save money. We make a lot of slime around here.
- 2 Tablespoons colorful craft sand – this is the fine-grained sand used in crafting, available at most craft stores. Plain sand will work but will have a much grittier texture.
- 1 Tablespoon contact lens solution — Any variety of contact solution should work (this is the stuff you use for storing contact lenses)
- 1 teaspoon Baking Soda
Try Sand Slime as A Virtual Visit: Ideas for Long-Distance Grandparents

For my “remote” grandchildren, I mail a set of supplies that are ready for play and all they have to do is dump them together. We can do this little project over a video call. Before shipping, I mix the measured baking soda and sand in a small baggie. I put extra contact solution in a small, mailable bottle. Be sure to seal the baggie with tape and cover the top of the contact solution bottle with a little plastic wrap before adding the cap. This will help prevent spills during shipping.
Sand Slime Tutorial:
Making Your Sand Slime
Gather the following tools:
- Mixing bowl
- Spoon
- Measuring spoons
- Baggie (for storage)
Instructions:
- Dump the entire contents of your bottle of glue into a mixing bowl.
- Add 1 teaspoon of baking soda and mix it in thoroughly.
- Next, add the colored sand and stir it in thoroughly as well.
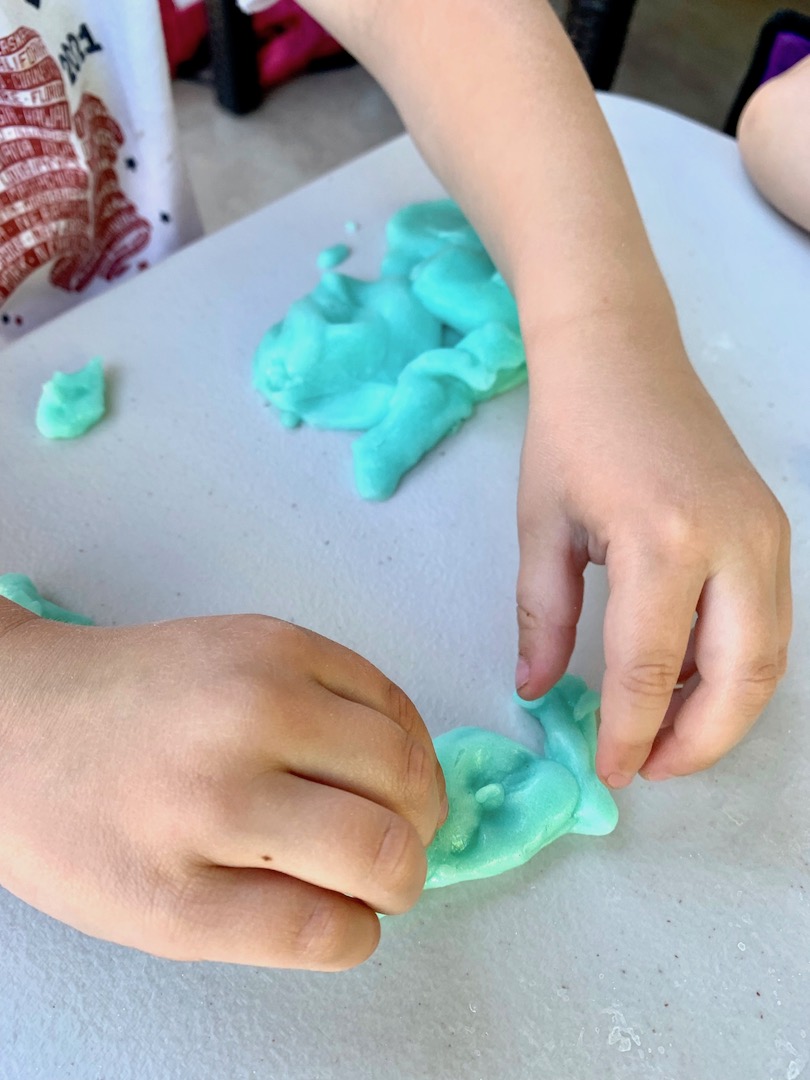
- Finally, stir in a Tablespoon of contact lens solution. Continue mixing until the mixture pulls away from the sides of the bowl, then continue kneading with your hands. If the mixture is sticking to your hands, put it back in the bowl and add a bit more contact lens solution until you have a mixture you can pick up and handle. Optional: Add some glitter to make your sand slime sparkle!
- Play with your sand slime!
- Store slime in a zip-top bag when you are finished playing.
Floral craft sand comes in lots of beautiful colors. You can mix and match them for some extra fun.
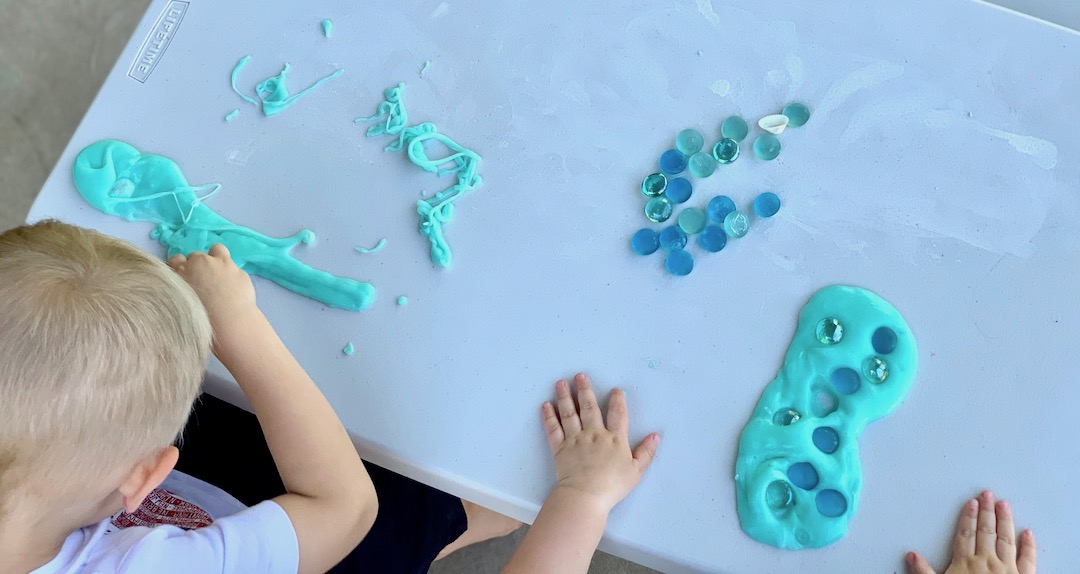
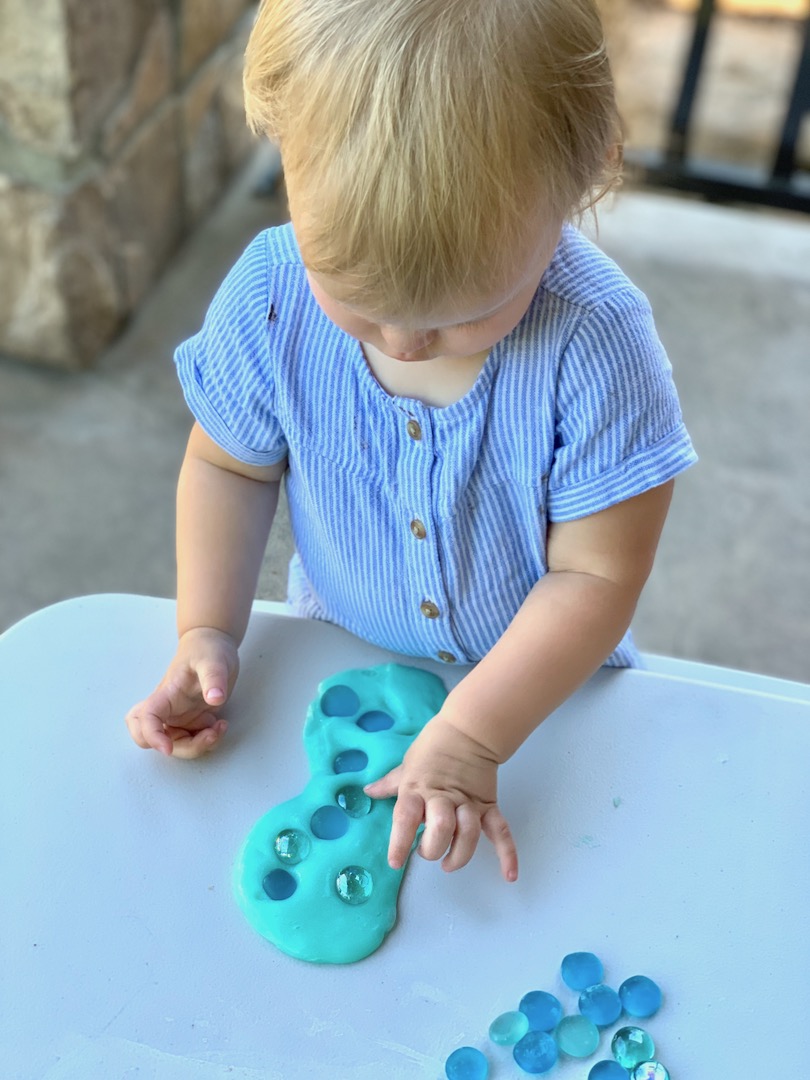
We added some colorful pebbles to our sand slime which added a new dimension of sensory play
Learn About Patterns as Part of Your Sand Slime Play
Sand Slime is just one of several activities in the Seashells Playdatebox which also includes several pattern-matching activities. So while we were at it, we learned a little bit about patterns and how patterns are created.
My intent was to see whether my 3-year-old grandson could continue a pattern I started for him. He could:
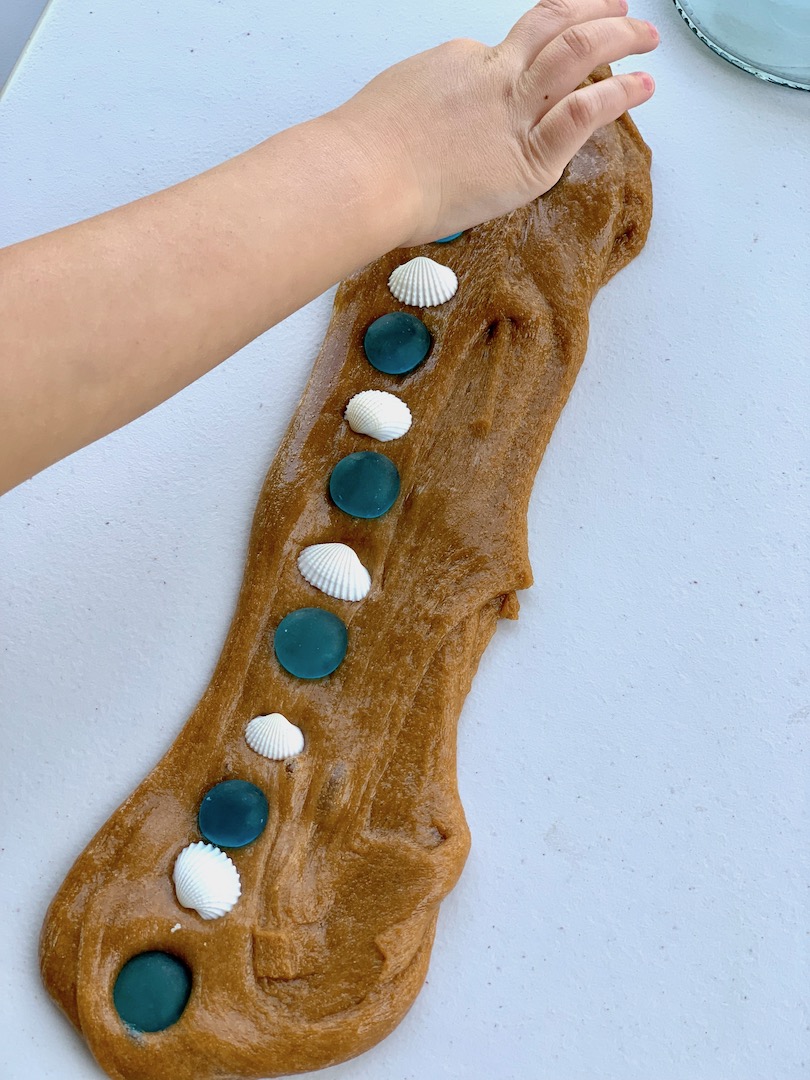
But there was just one problem with my pattern-making activity. This was not how he wanted to play. Instead, he gathered his sand slime into a ball and made his own version of a pattern:
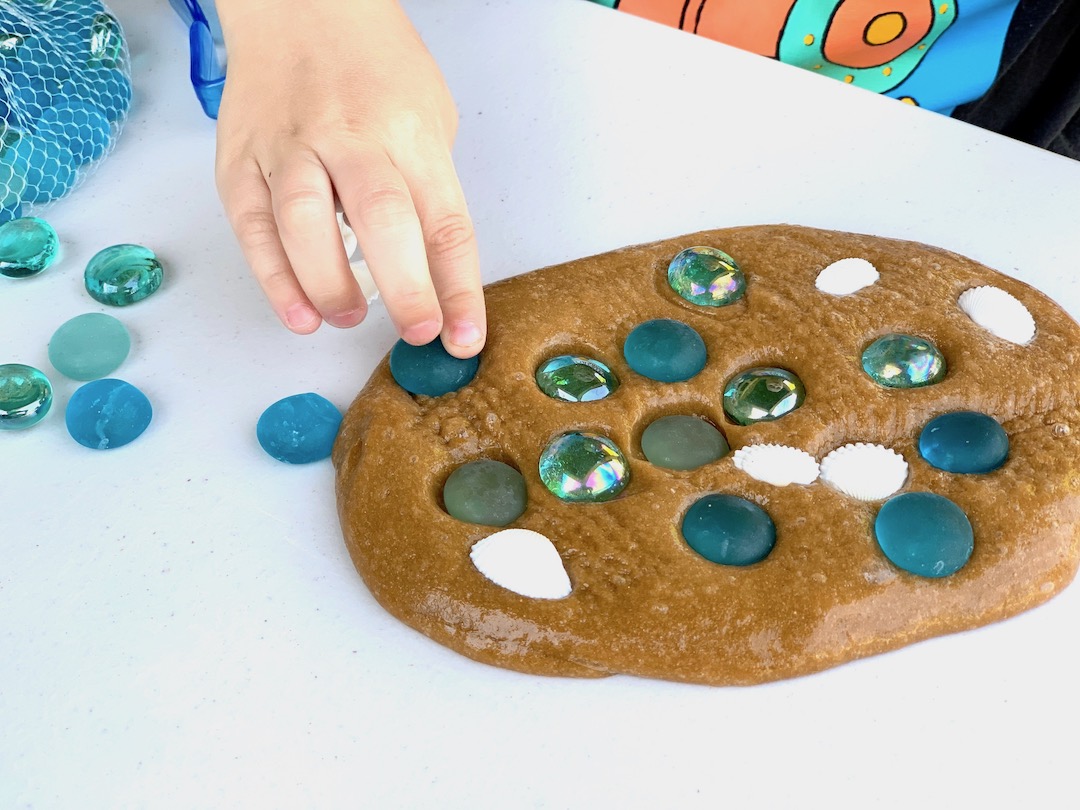
Don’t see it? The dark blue stones are named “Thomas” The shiny clear ones are “Percy” and the white seashells are “Anita.” They were placed exactly in a pattern as he said over and over, “Thomas, Percy, Anita…Thomas, Percy, Anita.”
Then he found a nail brush and wanted to make patterns in his slime with the nail brush. I almost missed letting him teach me that a 3-year-old understands “patterns” in a way that is appropriate for a 3-year-old. If I had insisted on my pattern-learning lesson, I may never have learned about his more interesting version. Here’s another pattern he made:
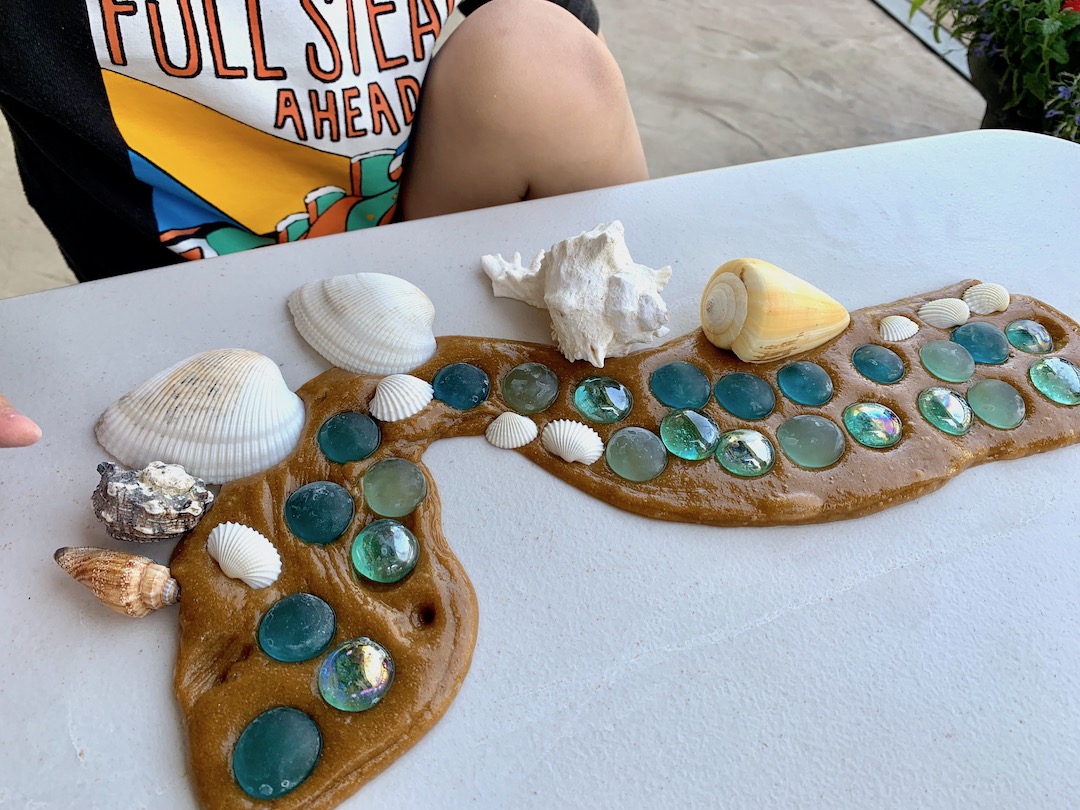
You and I would have to look very hard to see much of a precise pattern or exact symmetry in this “beach” created with brown sand slime. But it’s there, created in a way that worked well in his brain. My version lasted for about 35 seconds. His lasted for most of an hour. It was the perfect playdate for both of us. We learned a lot!